A small Airbnb studio has one problem: the camera makes it look smaller than it is. Guests scroll a listing and see a cramped room — the perception gap between "looks tight in photos" and "actually livable" costs you bookings before a guest ever reads a review. The solution isn't to find a bigger space. It's to stage the room so the camera reads it correctly: functional, bright, and larger than its square footage.
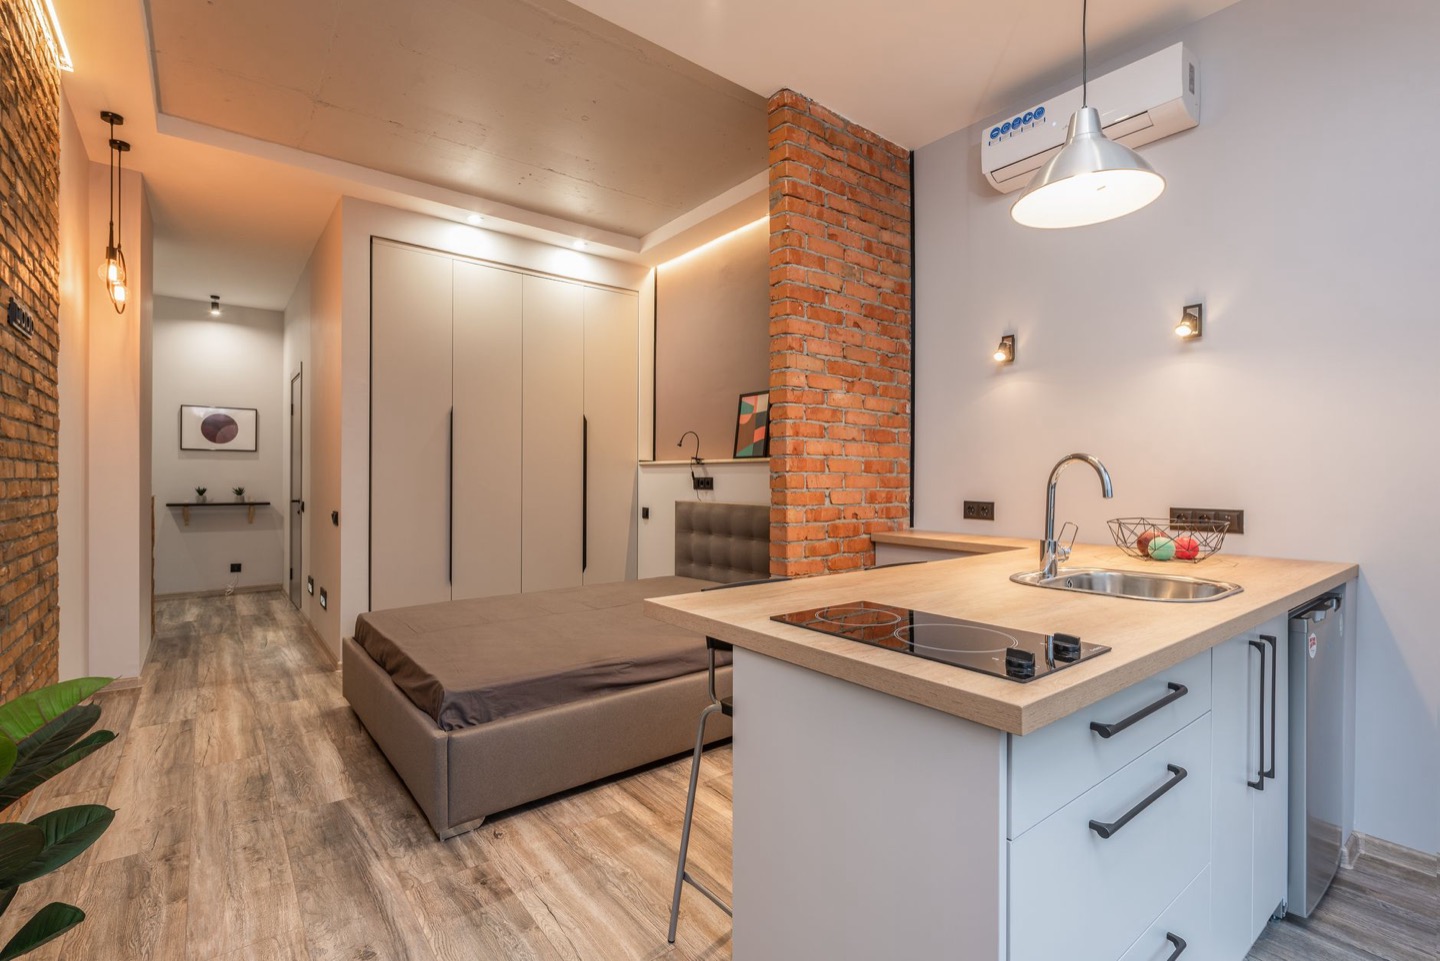 Before
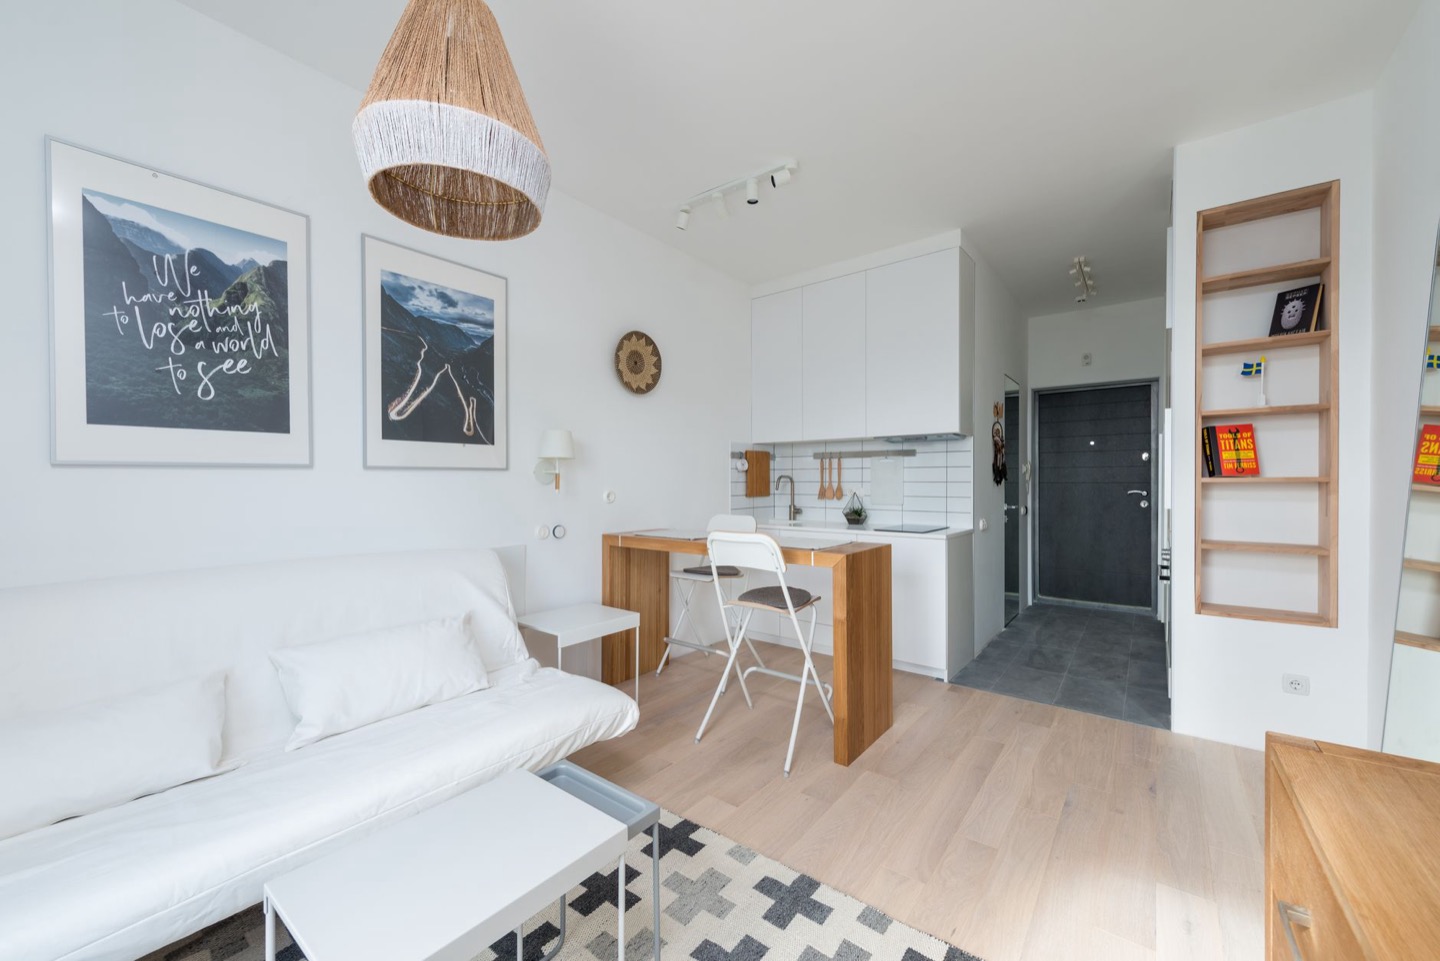 After
The small-room photography problem
In a small room, every staging mistake is amplified. A large room can hide a mismatched chair in a corner the camera doesn't reach. A studio can't — the camera sees everything in one or two shots, and every piece that fights the room makes the space feel more compressed.
The specific mistakes that shrink a room in photos:
- Dark walls or dark furniture (absorb light instead of bouncing it; the room looks dull and small)
- Too many pieces (every additional object in a small room reduces perceived space in photos)
- Low-slung or overstuffed furniture (hides floor space, which is how photos communicate room size)
- Matching-set furniture (coordinated sets look like showrooms, not livable spaces, and they often crowd the room)
- Overhead-only lighting (flattens the room into a single flat layer with no depth)
Fix those five things and the room looks bigger in photos before you add a single new piece.
Floor plan: the one rule for studios
The rule that matters more than anything else in a small studio: create a clear visual corridor from the camera to the back wall.
What this means in practice: the widest shot of your room should show unbroken floor space from the foreground to the back wall. Furniture should be pushed to the perimeter or organized so the camera's sightline is clear. A rug helps define the living zone without blocking the visual corridor — it signals "this is where the living area is" without adding visual mass above the floor.
The floor plan that works for most studios:
- Bed: against the longest wall, not the back wall the camera shoots toward. This keeps the bed from blocking the sightline.
- Sofa or sitting area: if you have one, perpendicular to or beside the bed — not facing it.
- Kitchen/dining: functional zone, kept minimal and at the edges of the frame
- Open floor: 40–60% of the floor should be visible and unobstructed in the widest shot
If you have furniture in the center of the room, it's almost certainly the piece to move or remove.
Furniture: what works in a small studio
Bed: A platform bed with a low, simple headboard. No footboard — footboards eat visual length. A queen fits most studios and photographs better than a full because the proportions read more like a hotel room. Frame color: natural wood or white, not dark.
Sofa or loveseat: If the studio is under 350 square feet, skip the sofa entirely — a reading chair + ottoman is more functional and takes half the floor space. If you keep a sofa, a two-seater in a warm neutral linen, legs visible, not touching the wall.
Storage: Open shelving reads lighter than closed cabinets. A single floating shelf does more for the visual space than a heavy dresser. If you need storage, use two slim nightstands instead of a large dresser and a small, low storage bench at the foot of the bed.
What to remove:
- Any piece you can't name a specific guest use case for
- The second nightstand if the room feels tight (one is fine in a studio)
- Rugs smaller than 6x9 — undersized rugs compress the room visually more than no rug
Shopping list
- White or natural-wood platform bed frame (queen)No footboard. Low profile keeps sightlines clear and the room feeling open.$189
- White waffle-weave duvet setWhite bedding reads clean and larger than any pattern. Waffle texture adds interest without visual noise.$72
- Cream linen accent chair with legs visibleOne chair, not a sofa, in a tight studio. Visible legs read as open space beneath.$129
- 8x10 flatweave or jute rug (cream/natural)Large enough to ground the bed zone. Light tone bounces light rather than absorbing it.$98
- Ceiling-height linen curtains, 96-inch pairHung at the ceiling, not the window top. Vertical lines make low ceilings read taller.$55
- Floating wall shelf (24-inch, white or light oak)Storage without floor mass. One shelf above the desk or beside the bed replaces a dresser.$34
- Two 2700K table lampsOne on each nightstand. Warm light, symmetry, no overhead reliance during photo shoots.$68
- Large mirror (24x36 minimum)Reflects light and creates a visual depth that makes the room photograph larger.$78
- One small plant in a white or terracotta potA single living plant stops a sparse room from reading as 'empty' in photos.$22
- One neutral linen throw (oat or grey)Draped on the chair, not the bed. Adds texture to a secondary focal point.$32
Lighting a small studio
The small-studio lighting setup is the same rule as every room, but more critical because there's no escaping a bad bulb:
- Turn off the overhead light before shooting. In a small room, overhead light casts shadows on furniture and floors that make the room look cluttered.
- All lamps on, 2700K bulbs only. Warm, soft, no blue-white.
- Add the mirror opposite the window. It doubles your natural light in photos.
If the studio has one small window, consider adding a floor lamp with a warm-white bulb in the corner opposite the window — it creates a secondary light source and adds depth to the photo that a single window can't give you.
Paint: make the ceiling feel higher
For small studios, wall color is doing two jobs: making the room feel warm and making it feel larger.
Best options:
- Benjamin Moore "White Dove" OC-17 — creamy and warm, photographs bright without being clinical
- Sherwin-Williams "Accessible Beige" — for rooms with good natural light
- Farrow & Ball "Strong White" — a warm white with enough depth to not look flat on camera
For the ceiling: paint it the same color as the walls, or one shade lighter. A white ceiling on colored walls creates a hard line that lowers the perceived height. Matching them blurs the line and makes the room feel taller.
For a studio, preview three warm neutral options on your specific walls before buying paint — the light in your room may read the same color very differently than it reads in a paint store.
The studio cover photo
In a studio, you usually have one wide shot that has to work as the cover photo. The setup for it:
- Shoot from the farthest corner — usually the entry or the kitchen end of the room — angled 45 degrees toward the main sleeping/living area
- Floor takes up ⅓ of the bottom of the frame — the rug and open floor communicate space
- No furniture cropping the foreground — anything in the corner of the frame looks like it's closing the room in
- Window in the background if possible — light pulling from the back of the room creates depth
Test a photo, look at it at thumbnail size on your phone. If it reads as "small," add the mirror opposite the window and reshoot.
See your studio restyled
Upload one photo of your studio and see how the design changes before buying anything. The before/after at the top is a real Restage output — same room, same bones, different arrangement, different palette, different camera story. See pricing here or use the design planner to scope every change before spending.
See your studio restyled and looking larger — before spending anything
Upload one photo. Get three layout and design variants for your specific room. Takes two minutes.
Preview My Studio$29 per additional room · One-time · No subscription
FAQ
What size bed should I put in a studio Airbnb? Queen if the floor plan allows it — it photographs more like a hotel room than a full, and guests perceive it as a more premium booking. If you're under 300 square feet, a full works. Never a twin in a listing meant for couples.
Should I combine the sleeping and living areas in photos? Yes — the "studio look" with one wide shot showing both zones reads as thoughtfully designed. Trying to hide the bed from the living area shot (using a curtain, a half-wall, etc.) makes the room look smaller, not more separate.
How do I make a low ceiling feel higher? Ceiling-height curtains (96-inch, hung at or near the ceiling line) and matching the wall and ceiling color are the two biggest levers. Both are on the shopping list above.
Can I make a 250-square-foot studio profitable? Yes — with the right floor plan, staging, and photos. The design ceiling for a well-staged small studio is the same as a larger one. Location and reviews sustain the rate; design and photos set the rate you can charge at the start.